


Wednesday 6 June 2012
HARISSASKY PTU Tutorial
Tutorial written on 6th June 2012
This tutorial assumes you have working knowledge of Adobe Photoshop CS2
♥ Supplies Needed ♥
♥ You Need TPP License number to use this Art
Font of Choice I used Scriptina
Mask of choice
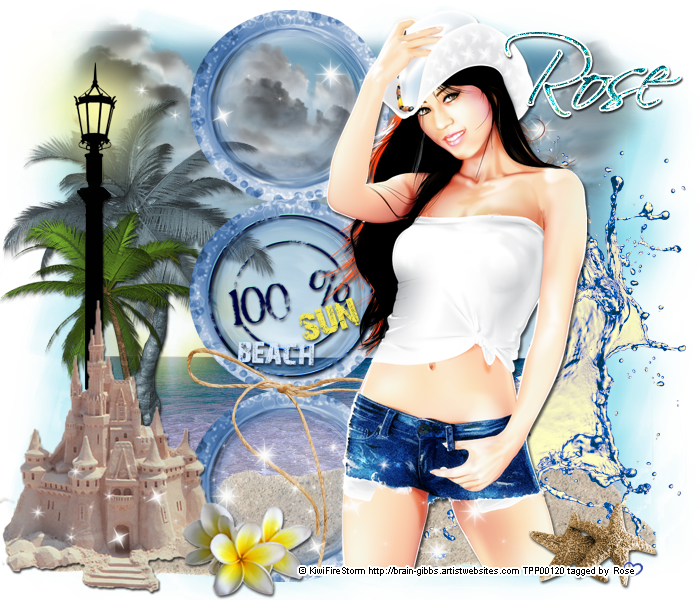
Open new image (ctrl+n) 700 x 600 pxl with white bg color
Open Element8 and paste it on your image in center
click Edit> transform> rotate 90 cw, resize it 70x 66
open tube and place tube layer1 resize 70x70 and place it beside element8
open element 60, 59 and 46. place layer 60(sea) lower part of image
and 59(sand) send lower part of image resize 80x80
and element 59(clouds) upper part of the image resize 85x85
place them behind element8 layer
Open Element 13,15,32, 41, 44, 46, 53, 54, 57,58
Element 54, transform>flip horizontal resize 50x50 rotate -22.0
Place Element 13 on the left side of image resize it 70x70
Element 53, transform> flip horizontal resize 60x60
Now place 58 on the left side of the image lower part resize 80x80
Element 41 on right side of layer 58 resize 80x80 rotate 18.6
Element 15 transform >flip horizontal place it behind tube layer1 on the right side of image
Element 44 on the left side lower part of the image
Element 32 on center of the element 8 and element 9 at lowert part of element 32
now add element 57 behind element 54 layer at left center of the image
now erase left and right side of the sea and clouds sticking out with
soft round 100pxl eraser tool (E)
add mask color #6ad3e6
now add element 32 and duplicate it 3 times place 2 layers at bottom of image and
one on the upper part of the image
don't forget to add drop shadow your elements
♥ Add copyright info and license number correctly
now add text add effects stroke (colorwhite) , drop shadow, pattern blue glitter
now delete your white bg layer and save your image as PNG
I hope you enjoyed this Tutorial 
Subscribe to:
Post Comments
(Atom)


0 comments:
Post a Comment